Quickstart
This guide describes how to install the Trustpoint-Client and utilize it to request the first application certificate.
Installation
We recommend using pipx (or pip) to install the Trustpoint-Client.
System Requirements
To install and use the Trustpoint-Client you will need at least the following.
python >= 3.10
pipx / pip
Installation using pipx or pip
pipx install trustpoint-client
Alternatives using PIP depending on the OS and environment:
pip install trustpoint-client
pip3 install trustpoint-client
Note
If you would like to rather clone the GIT repository, maybe to use try the latest changes on main, pleaser refer to the README.md in the corresponding repository:
You will require to use the Trustpoint-Client as python package using one of the following
python -m trustpoint-client
python3 -m trustpoint-client
Check the installation
Two new commands should now be available:
trustpoint-devid-module
trustpoint-client
The trustpoint-devid-module is responsible for handling and storing certificates and secrets and provides an API as described IEEE 802.1 AR DevIDModule. This command should usually not be needed or be used. The Trustpoint-Client wraps this library and provides higher level functions and features.
Onboarding the device
Navigate to the Trustpoint GUI. You need to create or select a device abstraction in the Trustpoint which represents the device to be onboarded. In this Quickstart Guide we are using ‘Demo-Data’ which can be … TODO
After injecting the ‘Demo-Data’, we can arbitrarily choose a device which is configured to use the ‘Trustpoint Client’ as ‘Onboarding Protocol’.
In our example, we want to onboard our Trustpoint-Client representing the freeformer-3D-Printer device, as depicted in the figure below.
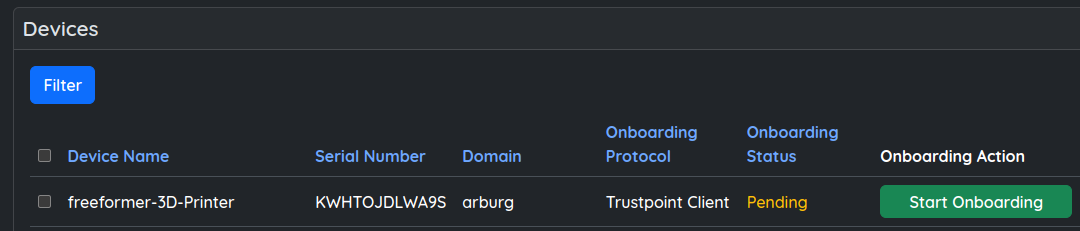
Now, click on the ‘Start Onboarding’ button. This will provide you with the needed command to onboard the device. Copy it to clipboard if possible or enter it manually on the device.
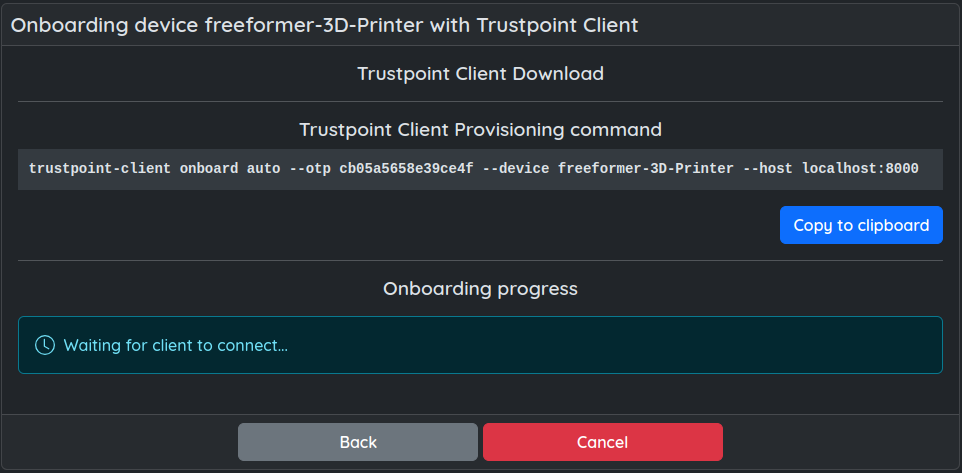
Executing this command, will onboard the Trustpoint-Client, that is the device. You can expect information like the following to be printed to stdout.
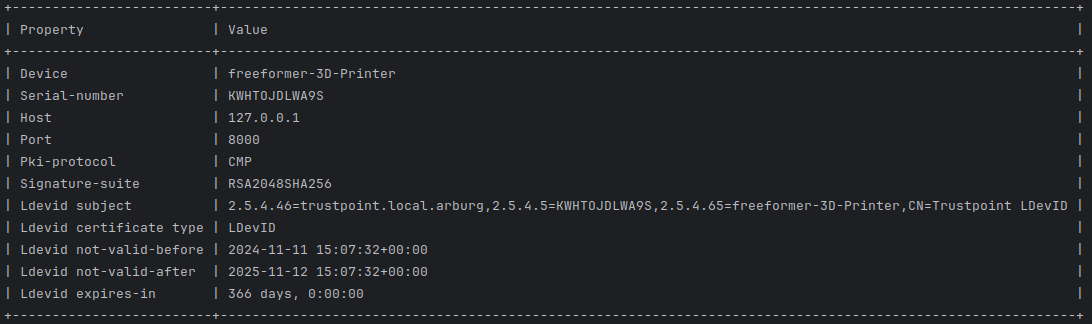
The Trustpoint-Client (device) is now onboarded and possesses a domain credential to request and manage application certificates.
We can now request application certificates. In this example we want to issue both a TLS-Client and TLS-Server certificate.
We choose some unique names (handles) to refer to those certificates in the future:
TLS-Client : my-tls-client-cert
TLS-Server : my-tls-server-cert
Now, to request a TlS-Client certificate we can use the following command:
trustpoint-client credentials request tls-client my-new-tls-client-cert
This should result in output like the following:
And we will also request our TLS-Server credential.
trustpoint-client credentials request tls-server --san-ip 192.168.5.1 --san-domain test.trustpoint.org my-new-tls-server-cert
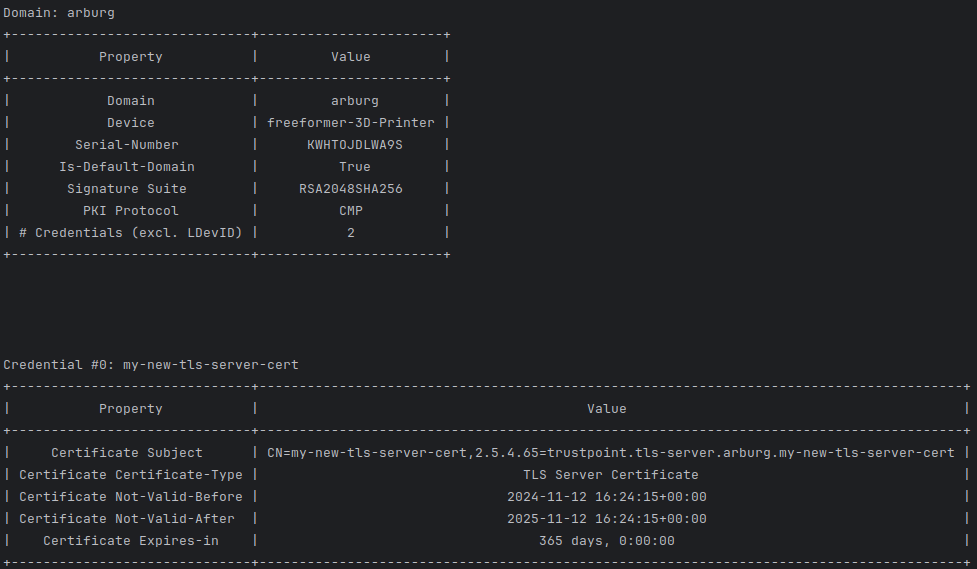
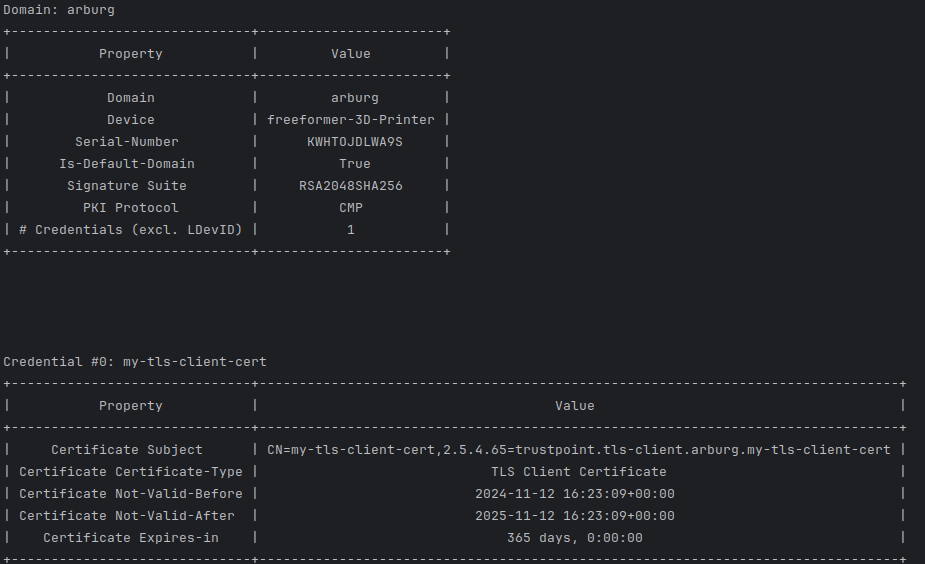
We now have two application credentials available, namely, my-tls-client-cert and my-tls-server-cert. We can list it on the CLI (excluding the private key). If we add –verbose or -verbosity, we will also get the PEM encoding certificate, certificate chain and public key.
trustpoint-client credentials list credential my-tls-client-cert -v
To actually use the credential, currently the only option is to export the credential. The following commands will store the credential in the given file path (–pkcs12-out, -o). If no password is provided, it will automatically generate a secure password and echo it to stdout.
trustpoint-client credentials export credential -u my-tls-client-cert -o my-tls-client-cert.p12
trustpoint-client credentials export credential -u my-tls-server-cert -o my-tls-server-cert.p12
It is also possible to only export the certificate, certificate chain, private and/or public key separately in different formats. Use the –help flag to discover all possible options:
trustpoint-client credentials export --help